Why Your Instruments Are Right (And Your Data Is Still Wrong)
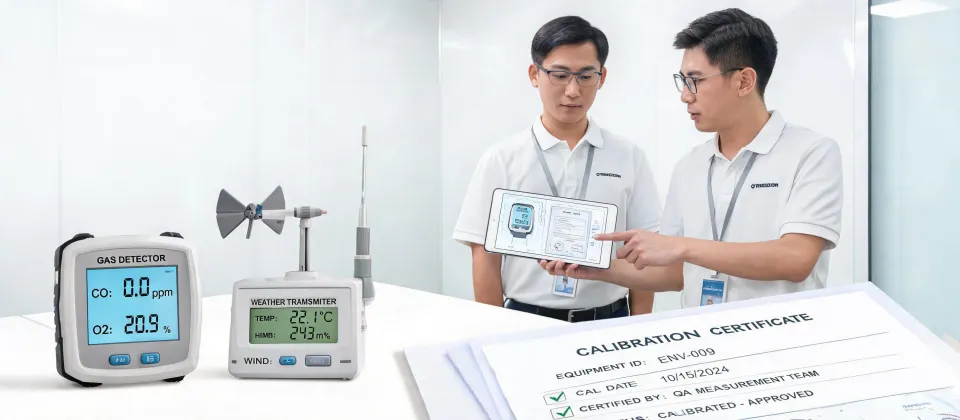
I review every measurement verification record that crosses my desk before it's used for anything that matters. Roughly 200 records a year, sometimes more. In Q1 2024, a customer sent back a batch of Vaisala humidity transmitters claiming the readings were jumping between 38% RH and 62% RH in a supposedly stable cleanroom.
We put all six transmitters on the reference bench. Every single one passed verification within its published tolerance.
The transmitters were fine. The problem was in how they were being used.
That situation is more common than this industry likes to admit. And after years of seeing the same pattern repeat, I think all of us would be better served by saying it plainly: your instruments are usually right. Your data is wrong because the chain around the instrument—placement, calibration history, installation, reading interpretation—is where the real failure lives.
The Problem Isn't What You Think It Is
When data looks wrong, the first instinct is to blame the device. "The sensor is faulty." "The weather station is giving bad readings." "The multimeter must be off."
What I've learned from reviewing failed verifications and returned equipment is that blaming the instrument is almost always premature. A sensor responds to the conditions around it and reports what it sees. If those conditions aren't what you think they are, the sensor isn't lying. It's often the only part of the chain that's telling the truth.
That's not a comfortable thought. It means the problem is usually in decisions we made—where we put the sensor, how we maintained it, and how well we trained the people reading it.
Where Measurements Actually Break
Let me rephrase what I tell every new technician on our team: a measurement isn't born inside a device. It's born across a chain. The sensing element, the electronics, the mounting, the environment, and the person interpreting the output—every link contributes. Any weak link corrupts the result.
From what we see in units returned to us and failed verifications, five problems recur.
1. Placement: The Sensor Sees Only What You Show It
I'm not a cleanroom design engineer, so I won't pretend to speak to every HVAC parameter. What I can tell you from reviewing thousands of verification records is that improperly placed sensors cause roughly a third of the "faulty" units returned to us. A Vaisala HUMICAP sensor measures accurately—but only where the air is representative. Mount it a few inches from a supply air diffuser and you'll measure a cold pocket, not the room. Do that consistently, and your batch records show impossible RH swings even though the room is stable.
The sensor is correct. The installation is wrong.
2. Calibration Drift That Gets Ignored
Humidity probes are electrochemical devices. Their sensing elements drift naturally over time. I'll give credit where it's due: the Vaisala HUMICAP sensor is one of the more stable humidity-sensing technologies I've worked with. The manufacturer's published long-term stability claims have matched what we see in returned units. But stability is not permanence.
We found a transmitter during a 2024 audit that had operated for almost two years without calibration. Its readings were well outside the process specification. Nobody had noticed because the numbers looked normal from day to day. Drift is like a clock running slow—invisible until reality catches up with you during an audit or a batch failure.
3. Weather Station Siting
Weather stations have their own version of the placement problem. A Vaisala weather station, whether a compact all-in-one system or a modular configuration, generates accurate meteorological data only if it's properly sited. That means away from building exhaust, above the roof line, clear of nearby structures.
One client of ours reported temperature data that perfectly tracked their HVAC supply-air temperature. They had mounted the station next to a rooftop unit's exhaust. The instrument was perfect. The measurement point simply didn't exist.
4. Reading Errors: The Meter Is Never the Problem
This brings me to how to read a Fluke multimeter—a phrase a lot of people search for, and for good reason. Misreading is one of the most common measurement failures I see in documentation.
I'm not an electrical engineer, so I'll stay in my lane. From a quality perspective, the most frequent multimeter error is ignoring the scale. A technician records "0.12 volts" when the display reads "0.12 mV." The meter was correct. The written record wasn't.
Automatic multimeters have reduced this specific error class by eliminating the manual range-setting step. That's real progress. But it introduced its own overconfidence: people assume the "auto" feature means the reading can't be misinterpreted. It can. An automatic multimeter still requires the operator to understand what they're measuring and how the leads are connected. The tool got more efficient—and I'm all for efficiency, we use automation wherever we can. But efficiency doesn't replace understanding.
5. Buying for Price Instead of Purpose
The purchase decision is where the most expensive measurement mistakes happen. A procurement saving of $200 today can silently cost $20,000 next year.
Take the Primo Star microscope price question. People ask me why one microscope costs several thousand dollars and another costs a few hundred. In optics, you're paying for the glass, the coatings, and the consistency of the optical path. You can't make precision optics cheap—physics doesn't negotiate.
I learned this lesson when we bought an inexpensive inspection microscope to save money. It missed a surface defect that we only discovered after the product had accumulated $14,000 in labor. The rebuild ate our margin and delayed delivery by three weeks.
The same logic applies to sensors. A $30 humidity module looks like a bargain next to a Vaisala HUMICAP transmitter. But if it isn't specified for the application, calibrated, and documented, it's not a measurement—it's a guess. And a guess can quietly turn into a regulatory finding, a rejected batch, or a product failure.
The Real Cost of Bad Data
I don't have hard data on industry-wide losses from measurement error. I wish I did. What I can tell you anecdotally from our operations:
We reject about 12% of first deliveries in our facility because the measurement documentation is inadequate. That's roughly one in eight units that can't be released until the paper trail catches up with reality. Each rejection triggers an investigation that consumes engineering hours and delays downstream work.
In 2023, a client lost a scheduled customer audit because one instrument's calibration had expired. The sensor was accurate. A notification had simply never been set—no plan, no calendar, no follow-up. The audit failed before anyone measured anything, on a point that could have been prevented with one calendar reminder.
Then there are the silent costs: decisions made from bad data that we never know about. A process change based on an incorrectly mounted humidity sensor. A weather station reading that persuades a team to cancel operations for a storm that isn't coming. These aren't dramatic, but they add up. The 8,000-unit storage incident we had in 2022? That one was caught before shipment, but just barely. The cost of re-verification alone was over $6,000.
A Better Approach
None of this requires buying the most expensive equipment on the market. It requires taking the measurement chain seriously. Here's what I advise, in plain terms:
- Know your instrument. Whether you're deploying a Vaisala weather station or using a basic benchtop meter, read the manual. Understand its uncertainty, its limits, and its required maintenance.
- Calibrate on a schedule. Set the next calibration date the day the instrument passes its current calibration. For humidity sensors, an annual cycle is a reasonable baseline—check your quality system or regulatory requirements for what applies to you.
- Install for representativeness. Put the sensor where it measures what you intend to measure. That may mean a proper mast for a weather station, the right probe depth in a process line, or a standardized location in a cleanroom. When in doubt, consider documenting the installation with a photo.
- Pay for the right tool. Not necessarily the most expensive. But choose instruments with documented performance. The Vaisala HUMICAP sensor has a long history of published stability data and reference-institution adoption, which makes our review work easier. That's worth something beyond the initial price.
- Invest in the human layer. Automatic multimeters, data loggers, and digital verification systems eliminate manual transcription errors. We've cut our turnaround from 5 days to 2—or rather, 2.5 days when you count the review step—since implementing digital verification tools. But the best instrument in the world is still only as good as the person applying it.
The Bottom Line
Next time your data looks wrong, ask a different question first: what is the measurement chain telling me? The sensor may not be the problem. The placement might be. The calibration record might be. The person reading the instrument might be.
Most of the time—especially when the instrument is a Vaisala with a verifiable history—you'll find the fault in the surrounding chain, not the device. The instrument is usually right. And accepting that is the first step to fixing the things that are actually wrong.

Marcus Feld
Marcus Feld is an electrical test and measurement analyst specializing in multimeters, oscilloscopes, clamp meters, insulation testers, spectrum analyzers, and data loggers. He applies IEC 61010-2-030 and IEC 61010-031 concepts while examining measurement category, bandwidth, true-RMS response, input loading, and stated uncertainty. His work helps maintenance engineers and test teams choose safe instruments with performance suited to the signals and environments they actually measure.